1.Camera function brief
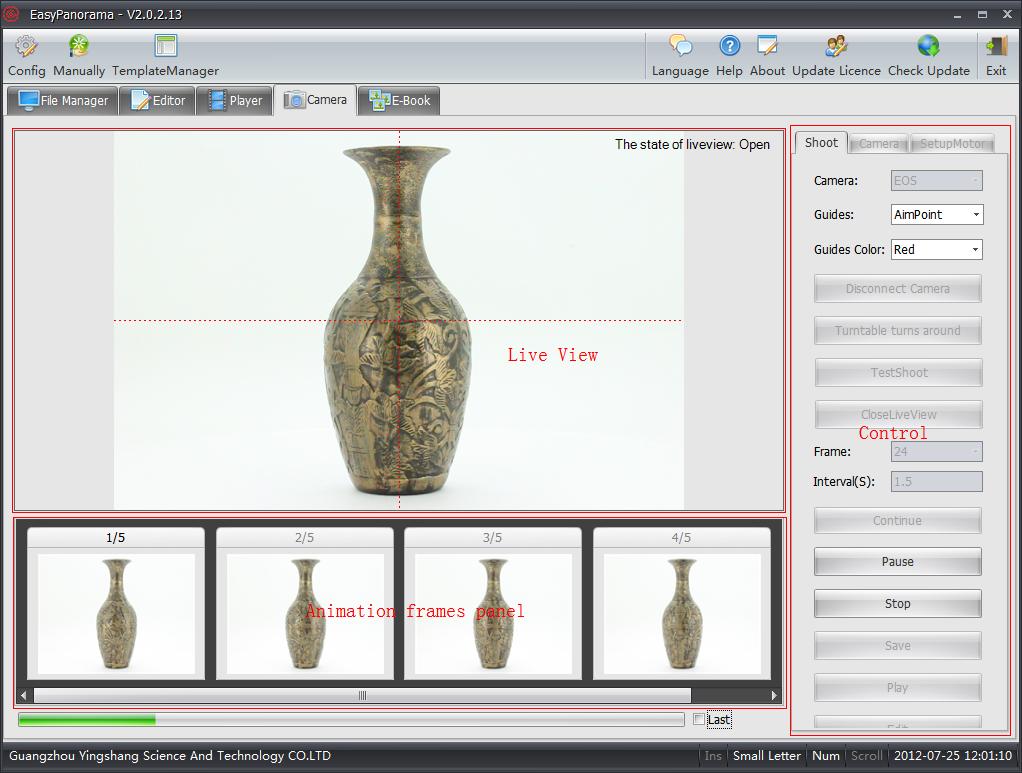
Camera funtion is the core module of the software,you would use this function as normally shooting.It includes three parts: on top of interface is "Live view" area,the bottom is "Animation frames panel" area and the right side is "Control" area.
2.Camera mian function
Camera mian function is easy to understand,the live view area is used for live view the photographed objects, Animation frames panel is used for displaying different angles images of photographing objects, here mainly introduce the control area.The control area offers controling the camera and truntable ,it includes three parts: Shooting,Camera Setting and Turntable Setting.
Ⅰ.Shooting
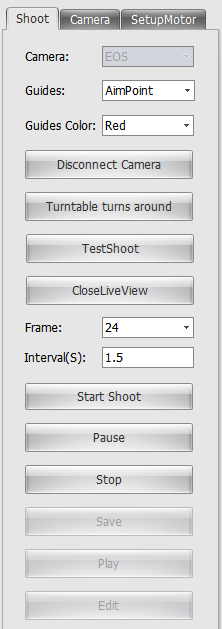
In shooting function ,you can choose camera type,guides and frame ect.It will be introduced as follows:
⑴ Camera Type
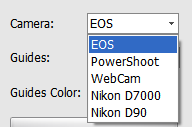
Firstly choose a camera type before shooting .Currently full-automatic shooting support Canon EOS,PowerShoot,WebCam,NikonD7000,NikonD90.And Canon EOS camera would be recommended.
⑵ Guides
Guides is mainly used as aid for live view area,it helps to focus on object centre
so that you can make satisfying animation effect.

⑶ Guides Color
There are four colors options:white,gray,blue and red.
⑷ On/Off camera
Click "On/Off" camera after connecting camera into computer.
⑸ Turntable turns around
You can try to turn around the turntable before shooting ,it not only make sure whether the object is in the centre of the turntable ,but also to check whether the angle is evenly when turntable is turing around.
⑹ TestShoot
You can shoot single image.
⑺ Open/Close Live View
The softwear will live catching shotting range ,some cameras are required close live view before shooting.
⑻ Frame
You can set different shooting number as you want in turntable setting ,the setting range is 4-120 .The greater the number of setting ,the more smooth the animation becomes ,and the size of generated animation file will be larger.
⑼ Interval
The interval will decreases with the increase of the amount of frame,usually it's not necessary to adjust it since the software will be setting automaticlly.
⑽ Start Shot,Pouse,Stop
Click "Start Shot" after setting products and connecting camera, you can pause and stop any time you want during shooting.
⑾ Save
You can save the achieved animation.
⑿ Play
You can play the achieved animation,see the player to get more detail.
⒀ Edit
You can edit the achieved animation,see the Edit to get more detail.
Ⅱ.Camera setting
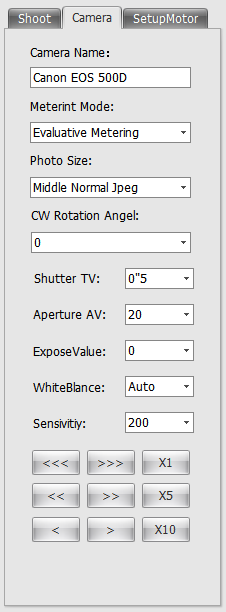
You can activate this option by connecting camera.Camera Seetting mainly offers aperture, shutter speed and ISO ect.camera general setting .
⑴ Camera
Display current connected camer type.
⑵ Metering Mode
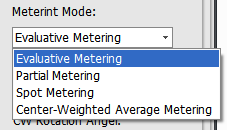
MeteringMode includes Evaluative Metering ,Partial Metering,Spot Metering and Center-Weighted Average Metering.Generally recommend Evaluative Metering ,If you want more detail about metering and Metering Mode is for your reference.
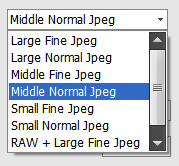
⑶ Image Size
The quality of images depends on the size of images,generally recommed using Middle Fine Jepg.
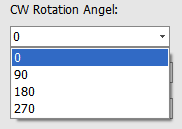
⑷ Clockwise
The live view box of software clockwise roating 90°、180°、270°,this operation is for shooting objects with width is narrow and hight is tall (such as vase),it requires camera also roating 90°,so that you can get close to full screen.
⑸ exposure compensation
Exposure compensation is used for those draker place,it can compensate more exposure.Setting this parameter "0"for those users who have a simple studio.
⑹ Shutter
The shuuter is time when the light through the lens ,the shorter the time is ,the less the exposure is,the darker the image is.we suggest that the reference is 1/20″~0.8″for those users who have simple studio.(It depends on different cases).
⑺ Aperture
Aperture is caliber when the light through the lens,the smaller the caliber is,the less the light is and the less exposure.we suggest that the reference is F16 for those users who have simple studio.(It depends on different cases).If you are shooting large object ,you can get more clearly image by using small aperture.
⑻ white balance
Generally choose "Auto",you can choose various white balance options if under specified conditions and the hue is unsatisfactory.
⑼ ISO
The greater the ISO is,the brigher the image is .Generally suggest setting 100 or 200,when you increase ISO ,the noise of sinal in magnifier also will be louder,and the images will cause the phenomenon of coarse particles
⑽ Focusing Mode
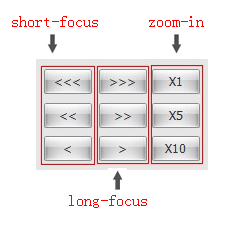
It requires to set "AF" before you can use this function.The left column and middle colum from the top - down order of focal length reduce/enlarge 3 times,2times and 1 time.The right column from the top - down order of enlarge focusing 1 time,5 times and 10 times,the sample as follows:
Ⅲ.Turntable Setting
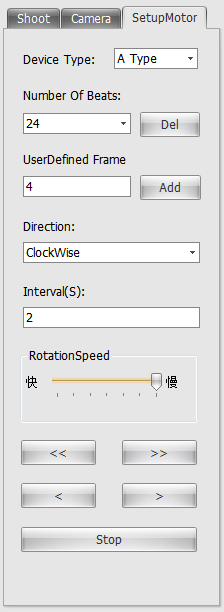
The Turntable Setting is manily used for adding or deleting users defined frame and manually controling turntable turns around.
⑴ Device Type
Display current connected turntable type.
⑵ Number Of Beats
You can define frame and delete current selected shooting frame.
⑶ Users Defined Frame
You can enter a defined frame and cLick"Add"
⑷ Direction
You can adjust the turntable direction clockwise or counter clockwise.
⑸ Interval
You can set the interval as turntable every turns,generally default 2 second.
⑹ Rotation Speed
You can adjust the speed of turntable totating,default as "Slow",you can also adjust according to different cases.

⑺ Manually Control Area
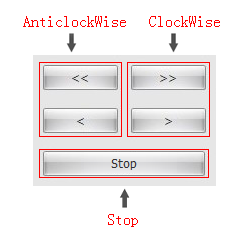
Manually Control Area can control the turntable move forward or backward,"<<"means move backward straightly,"<"means move backward once.
3.whether can reshoot those angle images?
All you need to do is right-click those images that required to reshoot, it will show "reset shooting" option, Clikc it and the turntable will turn back to that angle and reshoot then cover the orignal images.
